Import External Documents
If external documents (PDFs, Word, ...) are required to complete the Technical Documentation, these documents can be imported and classified. Classified documents are then automatically added to the Technical Documentation.
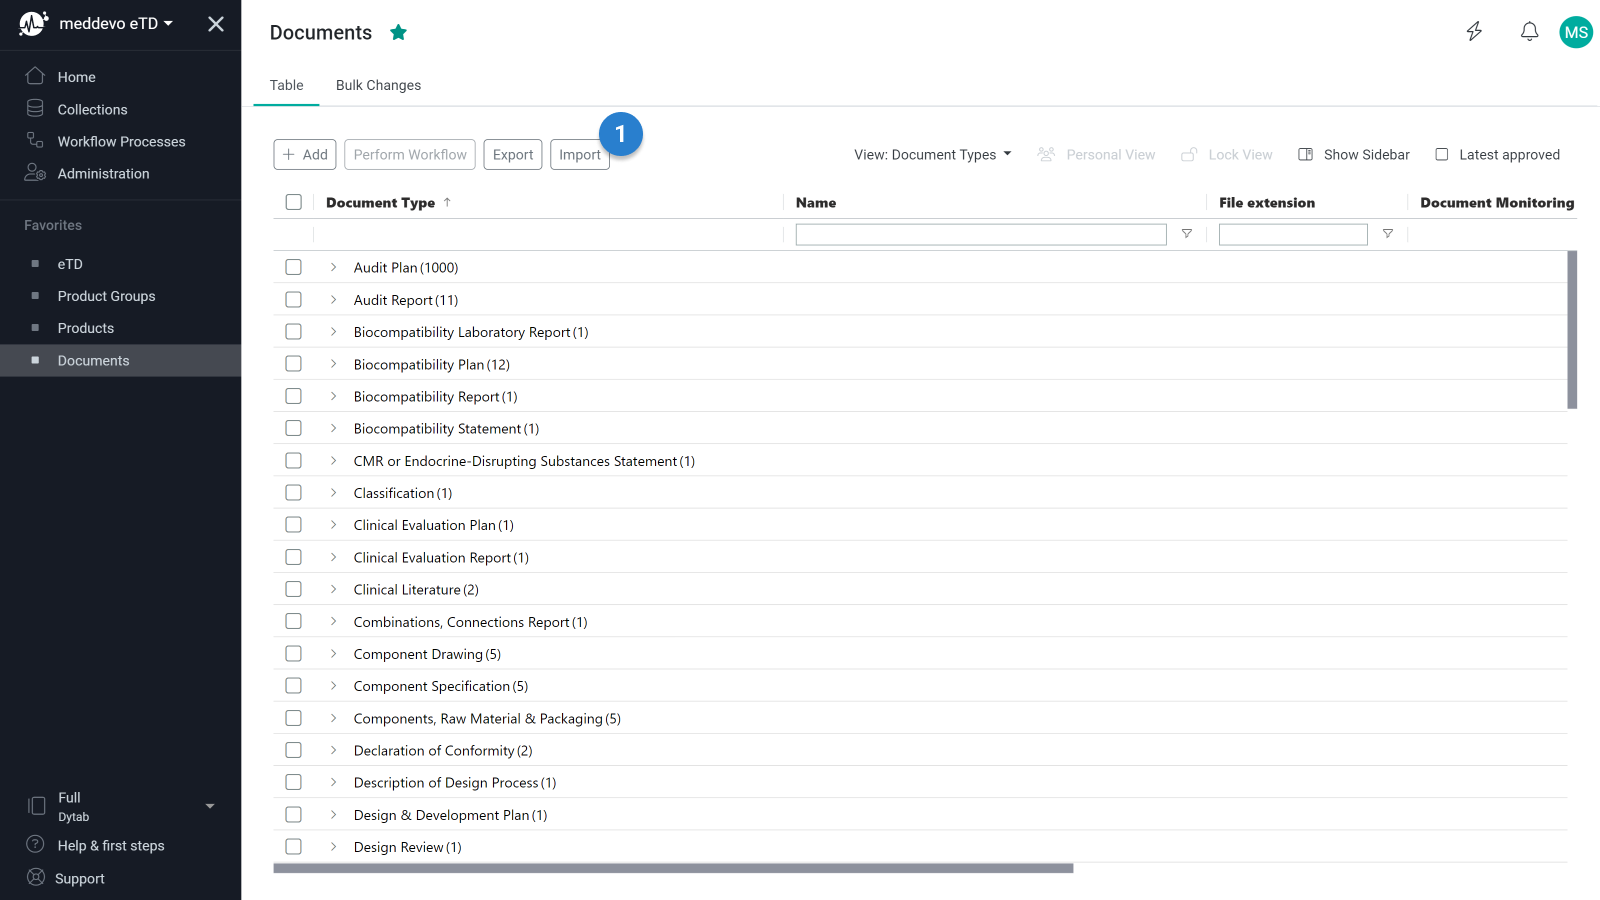
Click on "Import". (1)
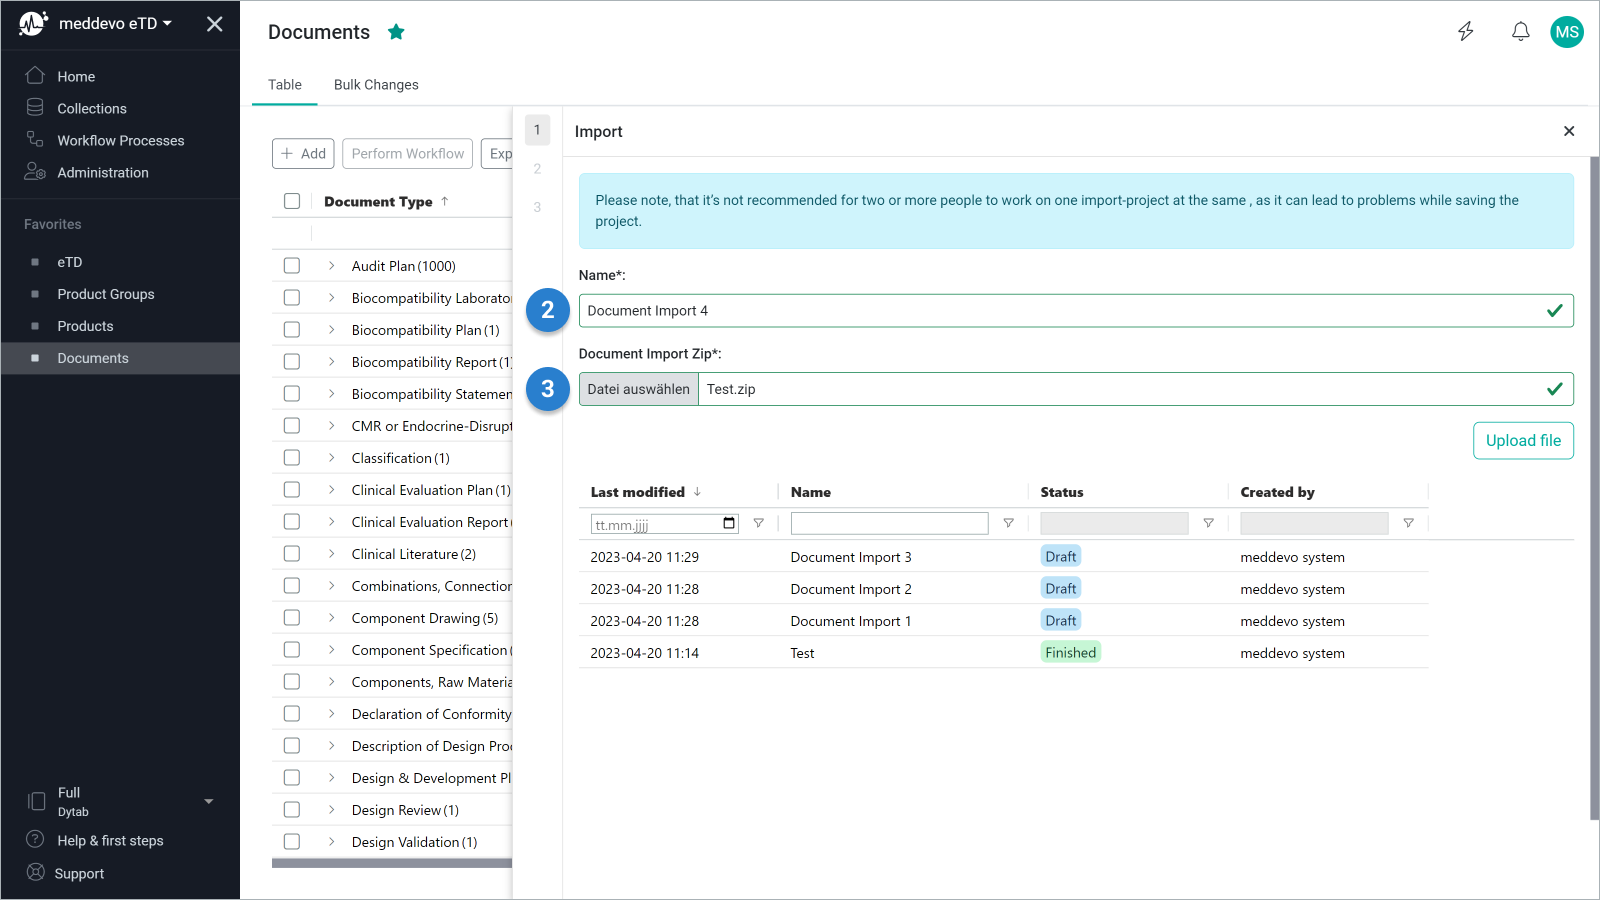
After clicking on the Import button, you will be taken to the document import upload page. Here you can assign a name for the import (2 ) and upload the previously prepared zip file (3).
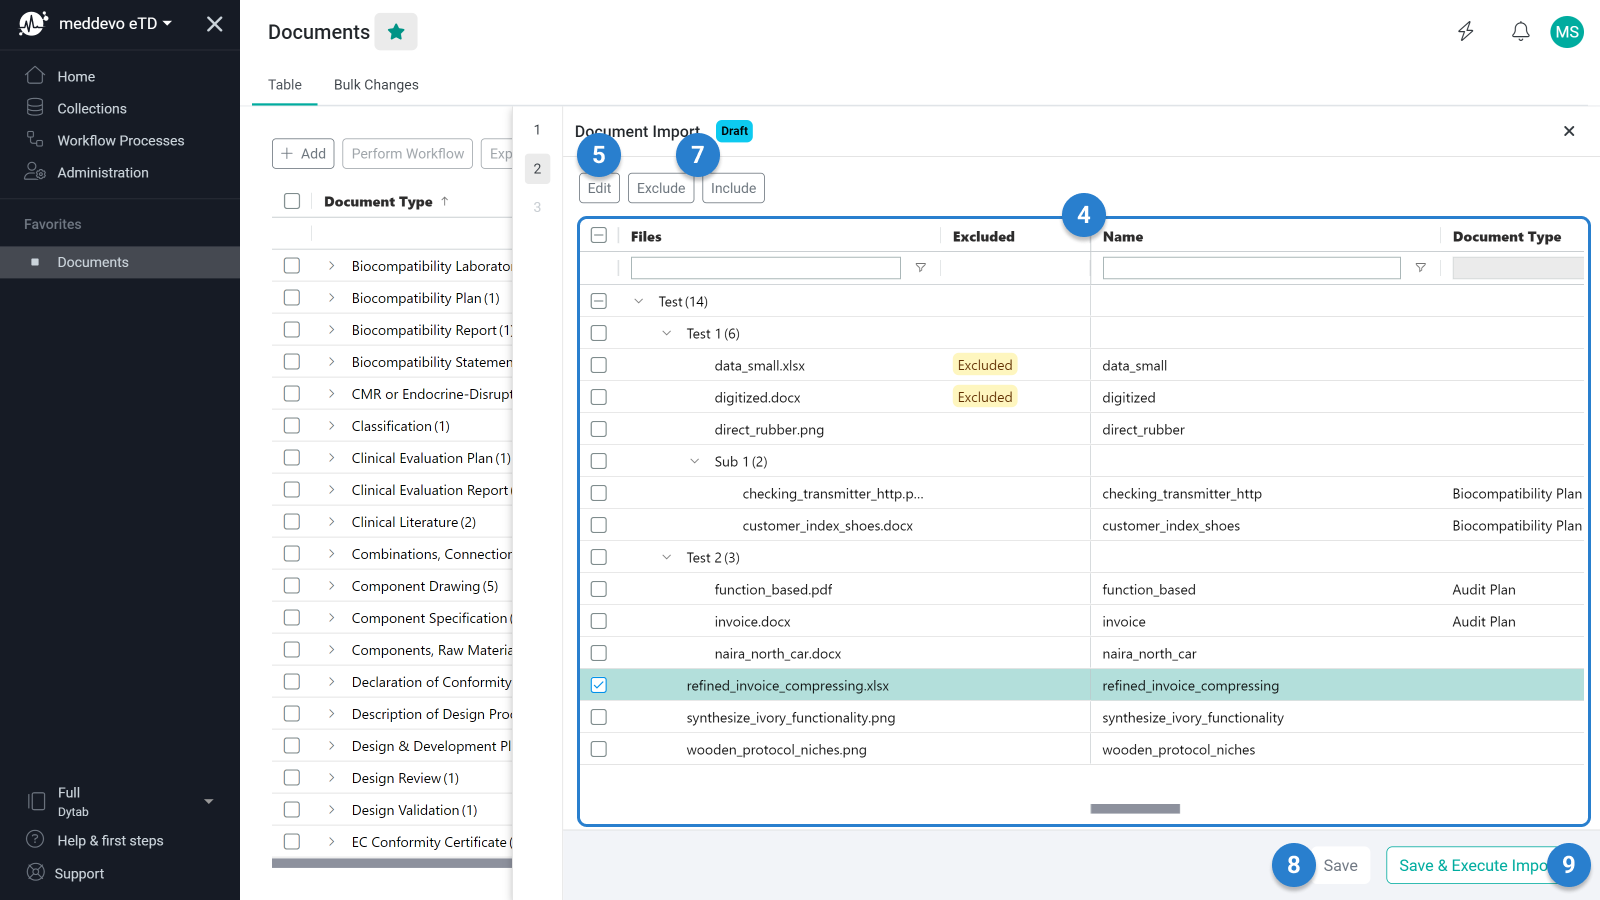
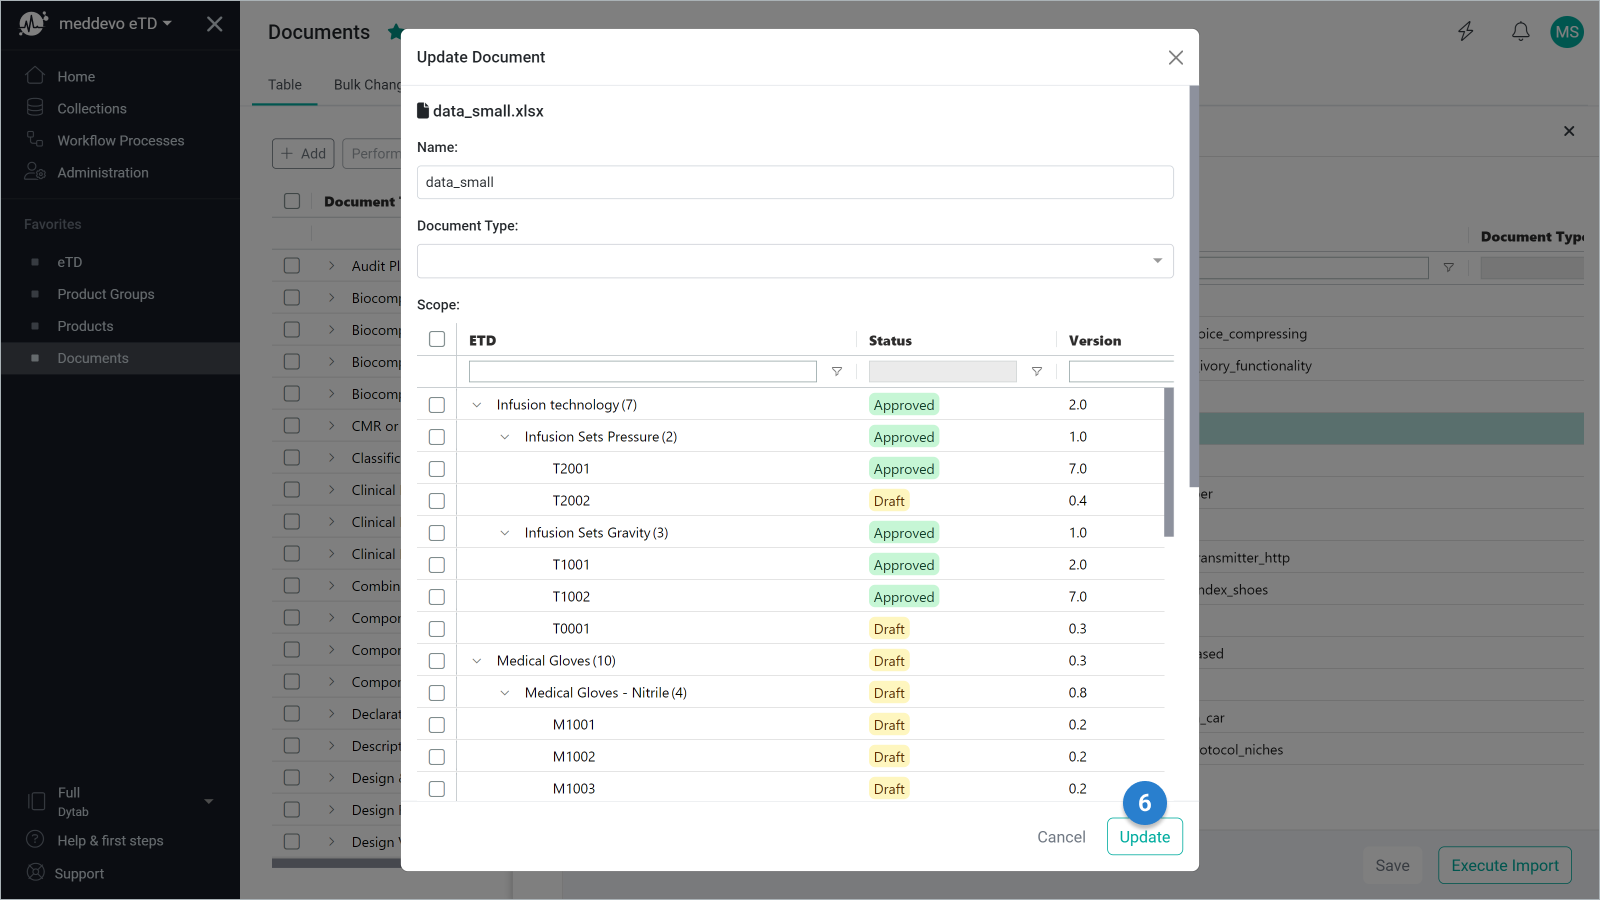
After uploading, you will be redirected to the editing page. At this point, the documents can be edited individually by clicking on the corresponding document or grouped by a previous selection (4) (5). In both cases, a dialog opens in which you can assign data to the documents according to the normal document upload function (6).
In this view, the document structure in the table can be filtered and edited accordingly. For example, you can use the document name to enter all documents containing the term "Marketing" in order to assign them the document type "Marketing material" (4).
Individual or multiple documents can be excluded from the import (7).
You can save the import project temporarily at any time and call it up again on the upload page to continue working on it (8).
The import can be started at any time by clicking on the "Execute import" button, provided the mandatory fields for all documents have been completed (9).
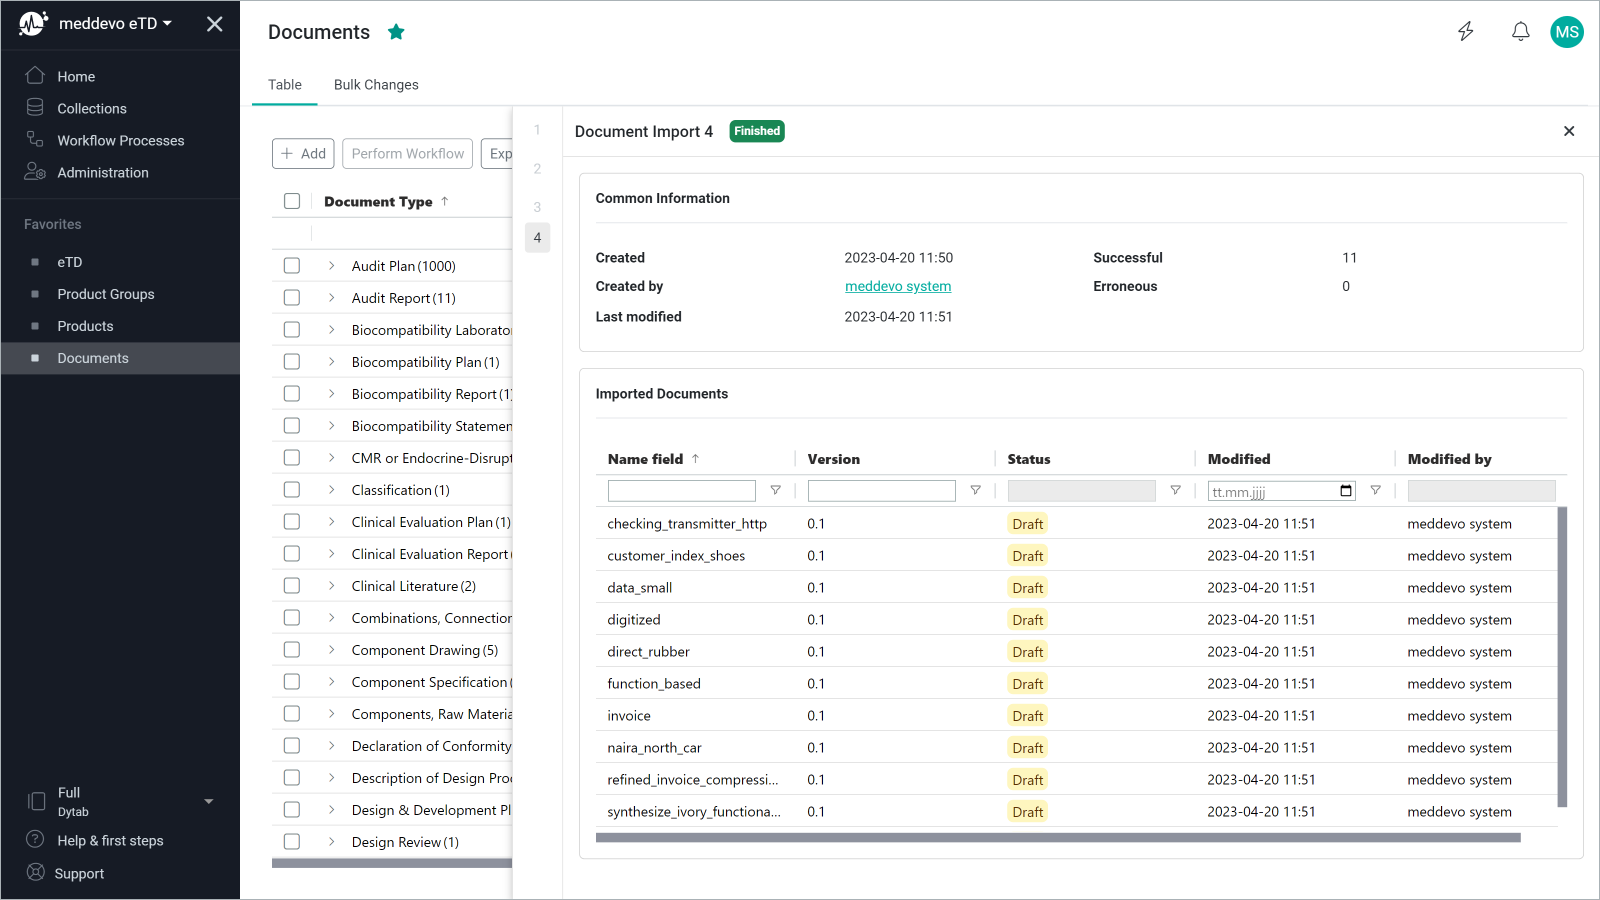
The processing of an import can take some time, depending on the size of the files. You will therefore receive a notification as soon as all the data has been processed (10).
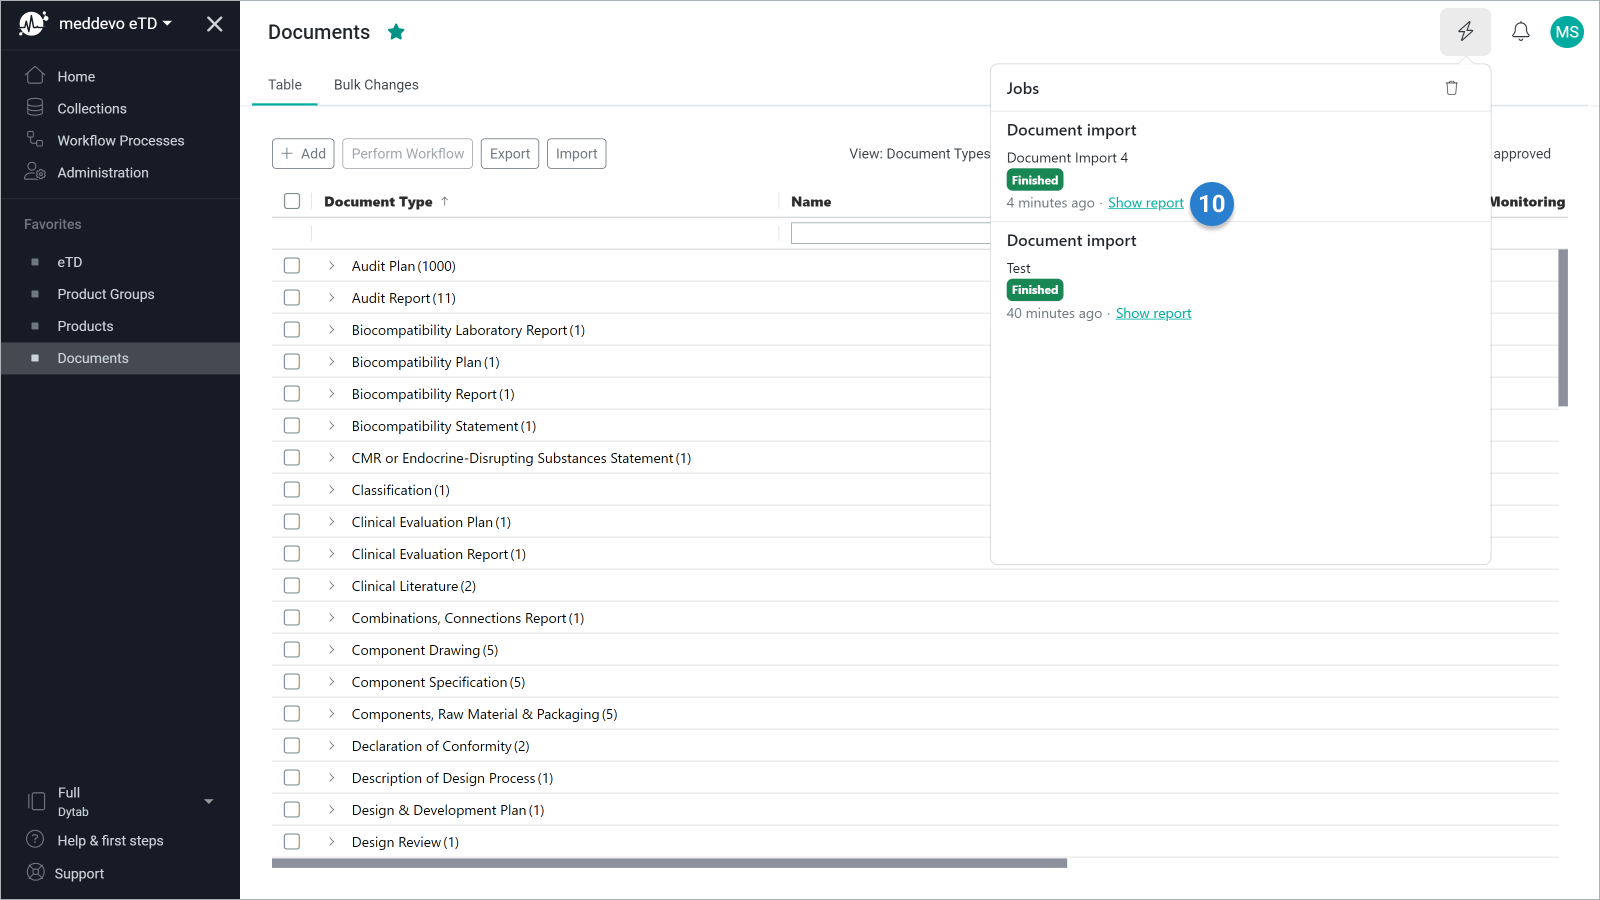
If the status of the notification changes to Finished, you can call up the import report via the "Show report" link.
Please note: This link is only available as long as the corresponding notification is not deleted.